


Table of Contents
Quick Summary
- Ceiling fans improve indoor air circulation and promote healthier ventilation compared to air-conditioners.
- They consume less electricity, helping reduce household power bills significantly.
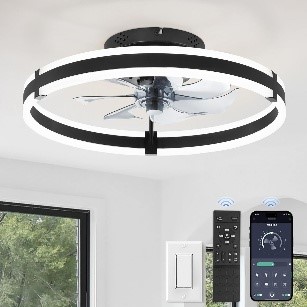
- Modern ceiling fans come with stylish designs and built-in lighting, enhancing room aesthetics.
- Fans can be controlled using wall switches, pull chains, or remote controls depending on wiring setup.
- Proper ceiling support using a fan-rated housing box and mounting bracket is critical for safety.
- Installing a ceiling fan usually takes about one hour if an existing fixture is present.
- DIY installation is possible for replacement projects, but new wiring requires professional help.
- Correct wiring and grounding are essential to prevent electrical hazards and ensure smooth operation.
Although air-conditioners are a common sight in most tropical households, no one can deny the significance of the good old ceiling fan. Through this blog, Gharpedia brings you the ceiling fan installation guide to help you understand how to install a ceiling fan in your room.
Every calamity brings with it lessons. COVID-19 also highlighted the importance of proper air circulation and good ventilation. Since air-conditioners require closed windows, they are viewed as a ‘risk element’ when it comes to virus-free air. So, many households across the globe are putting up ceiling fans, which, besides keeping us cool, also facilitate air circulation. This helps maintain safer indoor environments, as windows and doors are generally left open when fans are in use.
Why Do We Need Ceiling Fans?

Ceiling fans are a great option when you want to reduce your dependence on air-conditioning or simply improve air circulation in your home. They help with air change in your room. On warm nights, it’s nice to turn the ceiling fan to a low setting instead of having the ice-cold air of the AC blowing on you. Additionally, most modern ceiling fans come with built-in lights, so you don’t lose a source of illumination. In essence, you get a two-in-one benefit— cool air and lighting.
Then again, fans don’t end up shooting your electricity bill through the roof as ACs do! And if you are already facing a high electricity bill problem, then you must read our blog:
7 Effective Ways to Lower Your Household Electric Bills
Add to this that ceiling fans come in a wide variety of styles and finishes, and it’s no surprise they are becoming increasingly popular.
Designer fans can also enhance your home’s aesthetics. Learn more here:
4 Ways Designer Ceiling Fans Can Improve your Home!
So, shop around to find a ceiling fan that works with the décor in the room. A good point to remember here is that more expensive models operate more quietly and last longer.
So, shop around to find a ceiling fan that works with the décor in the room. A good point to remember here is that more expensive models will run quieter and last longer.
It’s Easy to Control a Fan

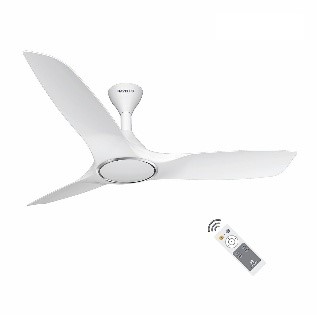
A ceiling fan and its attached light can be controlled using a pull chain, a wall switch, or both. In some cases, the light may be controlled by a switch and the fan by a pull chain, or the light can be controlled by one switch and the fan by another. The wiring setup depends on whether the power source enters the switch box or the housing box first. If a switch operates the existing light fixture, then you can typically use the same wiring for the fan’s light. However, if a new switch is required to operate the light, commission an electrician to install one. Another option is to buy a ceiling fan with a remote control to simplify operation and avoid complex wiring changes.
Putting up a Ceiling Fan: Support is Crucial

Courtesy - 5.imimg.com
Ceiling fans are heavier than light fixtures and require proper support. If your existing housing box is metal and firmly attached to the ceiling joists, it should be adequate. If not, remove the existing housing box and buy an expandable fan brace (sometimes called a hanger bar), which fits between joists and provides strong support. Ensure you use a proper ceiling fan mounting bracket and a matching housing box designed specifically for ceiling fans.
Before You Begin: Safety Checklist
Installing a ceiling fan involves electrical work and overhead handling. Follow these safety precautions:
- Switch off the main power supply from the circuit breaker
- Use insulated tools and rubber-soled footwear
- Ensure the ceiling height is at least 8 feet
- Check that the ceiling box is fan-rated and firmly fixed to joists
- Never attempt installation alone if you are unsure about wiring.
Ceiling Fan Installation Tools

The Following are the ceiling fan installation tools –
- Ceiling Fan
- Expandable Fan Brace and Housing Box (If Needed)
- Ladder
- Screwdriver or Drill
- Wire Coat Hanger (If Needed)
- Wire Cutters
- Wire Nuts
- Wire Stripper
Duration of the Task
As this project is only slightly more complicated than installing a ceiling fixture, you could wrap it up within an hour or so.
The Process: How to Install a Ceiling Fan

Can you install a ceiling fan yourself? If not, then no need to worry; go through this step-by-step procedure to learn how to install a ceiling fan:
- Switch off the circuit that powers the fixture you’re replacing. Flip the switch that controls that fixture a few times to ascertain that the power is off
- Remove the old fixture. Carefully read the instructions that come with the ceiling fan to understand all components.
- Insert the downrod into the canopy and feed the wires through it. Secure properly.
- Mount the ceiling plate and feed wires through it. Attach it securely to the housing box.
- Use the fan hook (if available) to hold the fan during ceiling fan installation.
- Match and connect wires according to instructions. Strip insulation and connect securely.
- Use wire nuts and ensure no bare wires are exposed.
- Connect white, ground, and other wires similarly.
- Attach the canopy and tighten screws.
- Connect the light fixture if applicable.
- Restore power and test the fan before attaching blades.
- If everything works correctly, attach blades and bulbs.
Go ahead and switch on the ceiling fan and enjoy the whiff of clean and fresh air!
Common Mistakes to Avoid While Installing Ceiling Fan

Avoiding these mistakes ensures long-lasting and safe operation:
- Using a normal light fixture box instead of a fan-rated box
- Incorrect wire connections
- Forgetting to tighten blade screws
- Ignoring wobbling after installation
- Installing a fan too close to the ceiling.
Troubleshooting

After installation:
- Check the circuit breaker and power supply
- Recheck wire connections
- Ensure the pull chain is turned on.
- Confirm the wall switch is functioning
- If the motor hums and does not rotate, call an electrician
- Clean blades every 2 months as a maintenance routine
- Tighten screws annually
- Check for wobbling
We hope this ceiling fan installation guide helps you install a ceiling fan and save on ceiling fan installation costs. If you are replacing an existing fixture, this can be a DIY project. However, if new wiring is required, it is best to hire a professional electrician.
Along with the ceiling fan, if you are planning to improve your ceiling’s look, then read:
Things to Know About False Ceiling for Your Interior!
FAQs on How to Install A Ceiling Fan
1. Can I Install A Ceiling Fan By Myself?
Yes, you can install a ceiling fan yourself if you are replacing an existing light fixture and the wiring is already available. However, if new wiring or structural support is required, hiring an electrician is safer.
2. What Tools Are Needed To Install A Ceiling Fan?
Basic tools include a ladder, screwdriver or drill, wire stripper, wire nuts, and wire cutters. You may also need an expandable fan brace and housing box for proper support.
3. How Long Does It Take To Install A Ceiling Fan?
Installing a ceiling fan usually takes about one hour if the wiring and mounting box are already in place. Complex installations may take longer depending on the ceiling structure and wiring conditions.
4. Why Is A Special Support Box Needed For Ceiling Fans?
Ceiling fans are heavier than light fixtures and need a strong housing box fixed to ceiling joists for safety. Without proper support, the fan can wobble or even fall.
5. Is A Ceiling Fan Better Than An Air-Conditioner For Ventilation?
Yes, ceiling fans allow windows and doors to remain open, promoting fresh air circulation. Unlike ACs, they do not trap indoor air and consume much less electricity.
Author & Expert Review
Written By: Huta Raval | Guest Author
| An English Literature and Journalism Topper, Huta Raval has graduated from the L D Arts College, Ahmedabad. Post serving for 23 years in the NBFC and Public Library Sectors her desire for ‘writing the unwritten’ brought her to the creative field of content writing. Her clientele comprises of NGOs, Blogging Platforms, Newspapers, Academic Institutions, et al. |
Verified By Expert:  Ravin Desai – Co Founder – Gharpedia | Co Founder – 1 MNT | Director – SDCPL
This article has been reviewed for technical accuracy by Ravin Desai, Co-Founder of Gharpedia and Director at Sthapati Designers & Consultants Pvt. Ltd. With a B.Tech. in Civil Engineering from VNIT Nagpur and an M.S. in Civil Engineering from Clemson University, USA, and over a decade of international and Indian experience in the construction and design consultancy sector, he ensures all technical content aligns with industry standards and best practices.
Find him on: LinkedIn